
Optimizing Kubernetes Scalability with AWS Warm Pool: A Solution to the Cold Start Challenge.
Cold Start Problem
In the process of expanding nodes within a Kubernetes cluster, a challenge known as the Cold Start issue may arise. The term Cold Start refers to the delay experienced when new nodes are added to a Kubernetes cluster but take a significant amount of time to become fully operational. This delay is due to the time required for initialization processes, such as pulling container images, starting containers, and running startup scripts. This issue can affect the responsiveness and efficiency of the cluster, particularly in scenarios requiring rapid scaling.
Solutions to the Cold Start Issue
Several solutions can be considered to address the Cold Start issue in a Kubernetes cluster.
One approach is the use of a Golden Image, which is a pre-configured image that already includes all the necessary resources. A Golden Image typically contains pre-pulled container images, pre-installed necessary software, and pre-configured settings. This approach ensures that when new nodes are added to the cluster, they are already equipped with the essential components required for immediate operation, thereby reducing the initialization time.
An alternative solution is the implementation of a Warm Pool, a set of pre-warmed nodes that are kept in a standby state. These nodes have already completed the initial startup processes, such as container image pulling and script execution. As a result, they can be rapidly integrated into the cluster when needed, significantly reducing the time to become operational. This approach is particularly effective in scenarios where quick scaling is crucial, as it allows for faster deployment of new nodes without the typical delays associated with the cold start process.
AWS Warm pool
In this article, we will explore the Warm Pool solution offered by AWS, specifically designed to address the Cold Start issue in Kubernetes clusters. This innovative approach significantly enhances scalability and responsiveness in cloud-based Kubernetes environments. The Warm Pool concept focuses on preparing a pool of nodes in a semi-initialized state, ready for rapid integration into the cluster as required.
Understanding the Warm Pool Mechanism:
- Pre-Initialization: The Warm Pool maintains a set of EC2 instances in a semi-initialized state. These nodes have already completed initial boot-up processes, such as pulling container images and executing startup scripts, positioning them close to deployment readiness.
- Stopped and Hibernated States: Nodes in the Warm Pool are maintained in either ‘stopped’ or ‘hibernated’ states. In AWS, a ‘stopped’ state means the instance is not actively running, but it retains its instance store data. This state is beneficial for reducing operational costs while keeping the instance’s data intact. On the other hand, the ‘hibernated’ state extends this functionality by saving the instance’s in-memory data to the root EBS volume before stopping. This additional step allows for a quicker resumption of the instance, as it restores both the instance store data and the in-memory state.
- Rapid Integration: When the Kubernetes cluster needs scaling, nodes from the Warm Pool can be quickly transitioned from stopped or hibernated states to an active state. This process bypasses the usual delays associated with initializing new nodes from scratch, as the nodes only need to join the cluster, significantly reducing start-up time.
- Cost-Effectiveness: An important advantage of the Warm Pool is cost savings. Keeping instances in the stopped or hibernated state is free of charge, making it a cost-effective way to have resources on standby without incurring the expenses of fully operational instances. This balance between readiness for scaling and budget considerations makes it a practical solution for managing variable computing demands.
Terraform Project for Deploying EKS with Warm Pool
The project sets up a VPC, Security Groups, an EKS cluster, and various necessary addons, including coredns, kube-proxy, vpc-cni, eks-pod-identity-agent (optional), and a cluster autoscaler.
GitHub Repository: https://github.com/kankou-aliaksei/terraform-eks-warm-pool/
Prerequisites for Running an EKS Terraform Project with a Warm Pool
Before beginning, ensure the following tools are installed and configured:
– Terraform: Install from HashiCorp’s Terraform Installation Guide.
– AWS CLI: Install or update to the latest version following AWS CLI User Guide.
– AWS Credentials: Set up your AWS credentials for access.
– kubectl: Install using the Kubernetes Official Guide.
– git: Install using the Git Installation Guide.
Deploying an Example Application with Warm Pool on Kubernetes using Terraform
1. Clone the Git repository
git clone https://github.com/kankou-aliaksei/terraform-eks-warm-pool.git2. Initialize and Apply Terraform Configuration
cd terraform-eks-warm-pool/examples/warm_pool_and_eks
terraform init
terraform apply
3. Update your kubeconfig file to interact with the new EKS cluster
aws eks --region eu-central-1 update-kubeconfig --name warm-pool-eks-clusterYou should see something similar in the output:

4. Verify your connection to the cluster
kubectl cluster-infoYou should see something similar in the output:

5. Verify Instance States
aws ec2 describe-instances \
--filters "Name=tag:Name,Values=warm-pool-eks-cluster-ng" \
--region eu-central-1 \
--query "Reservations[*].Instances[*].[Tags[?Key=='Name'].Value|[0], InstanceId, State.Name]" \
--output text
You should wait until you see in the output that a worker node instance has been created and is in a stopped status. This indicates that the worker node has completed script initialization and has entered the pool in a stopped status, and now we have one node in the Warm Pool.

6. Deploy Test Application
Make sure you go to the “deployment” folder relative to the base project folder
cd deployment
kubectl apply -f test-deployment.yaml
7. Monitor the deployment
watch "kubectl get pods"
You will see that the pod launch occurs within 90 seconds, despite the basic setup of the instance requiring 2 minutes, because all the basic configuration is completed during the instance’s warm-up period.
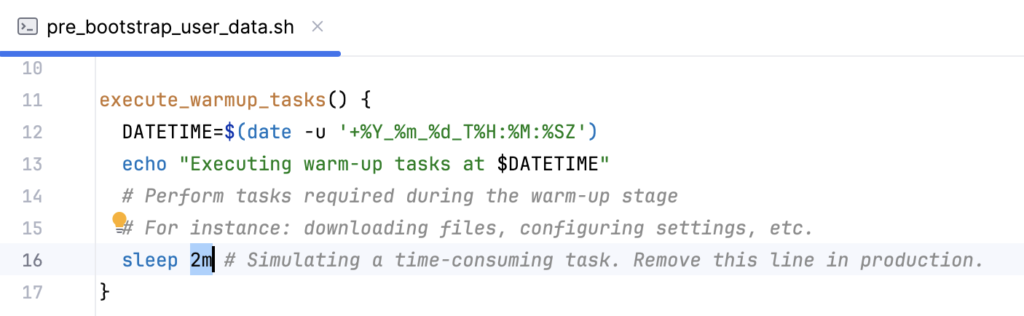
See the warm-up tasks.
8. Destroy terraform project
If you have finished testing and no longer need the project, remember to delete it to avoid incurring additional charges.
Ensure that you are in the examples/warm_pool_and_eks directory before executing
terraform destroy
